
The Ultimate Guide for Converting a YouTube Video into a Blog Post for Free Using AI (Chat GPT) [2024]

Andrew Petrovics
Mar 20, 2024
If you are wondering how to create a blog post from a YouTube video (or any video really), you have come to the right place.
In this guide we are going to over exactly how you can turn any video into a high quality blog article for free in just three simple steps using Chat GPT.
Step 1: Pick a video
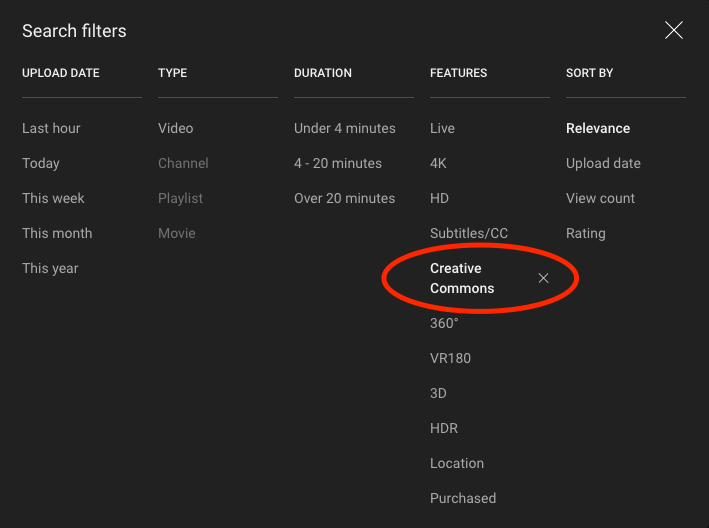
The first step is of course choosing a video. If you are not choosing a video that you own, then you will want to search for a video on YouTube with a Creative Commons license. To do so you can use the search filter on YouTube as shown below.
In our case we are going to choose the following video: What is Artificial Intelligence? In 5 minutes.
Step 2: Get a transcript
The next step is to get a transcript of the video.
Thankfully, most YouTube videos have transcripts. If your video does not have a transcript or the transcript is not accurate, you will have to transcribe the video using a third party service. There are many services that offer this, but we came across Notta which offers a free trial and allows you to paste in a YouTube link so you do not have to download the video which requires YouTube premium.
If your video does have a transcript (most likely the case), you can get it by following these steps...
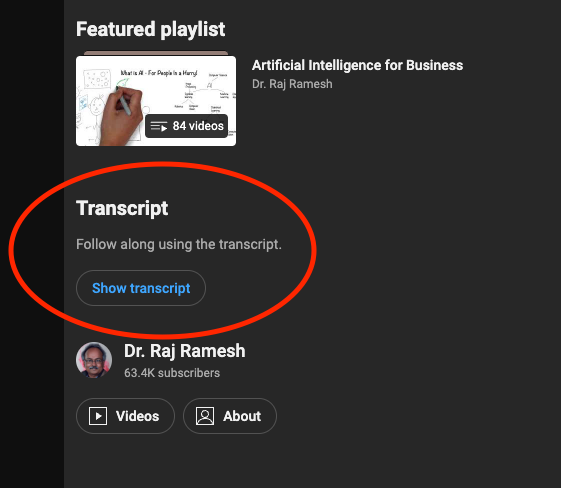
1. Click Show Transcript Button
First, click on the Show Transcript button as shown below. This button will be towards the end of the YouTube video description so click on the description first to exapand it.
If you do not see a Show Transcript button in the description, then that likely means the video does not have a transcript and you will need to transcribe it using a third party service.
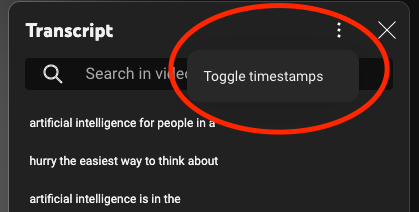
2. Click Toggle Timestamps Button
Next, click on verticle ellipsis button (top right) and then click the Toggle timestamps button.
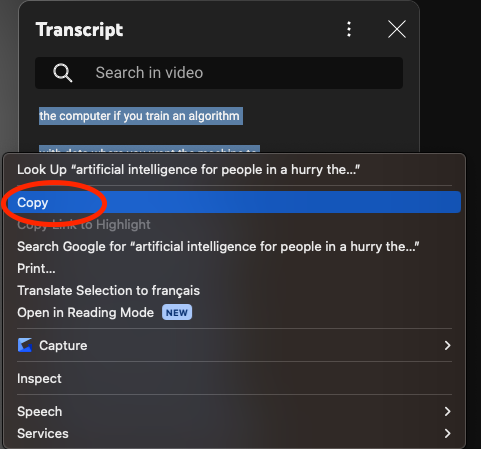
3. Highlight and Copy
Finally, simply highlight and copy the transcript and that's it!
Step 3: Use AI to create your blog
Now that you have a transcript, here comes the fun part: we can start creating the blog with AI.
1. Sign up for a Chat GPT Account
If you do not already have an account with Open AI, head to their website and sign up for a free account that will give you access to Chat GPT-3.5.
You can also sign up for a pro account which will give you access to GPT-4 which will result in higher quality blog posts, but it will be a paid account
2. Input your prompt
Once you have access to Chat GPT, you can then input a prompt to create your blog.
While we are going to use a fairly simple prompt you can of course expand the prompt to fit your needs depending exactly on what kind of content you are aiming to generate.
Here is the prompt we will be using:
While this is an incredibly simple prompt, you can add so much more to customize your needs including (but not limited to):
- Specify a format (markdown, HTML, etc)
- Specify a tone
- Optimize on a particular key word or key phrase
- Specify a point of view
- Specify your own outline
3. Execute the Prompt
Now that you have your prompt, you can just hit the button and go!
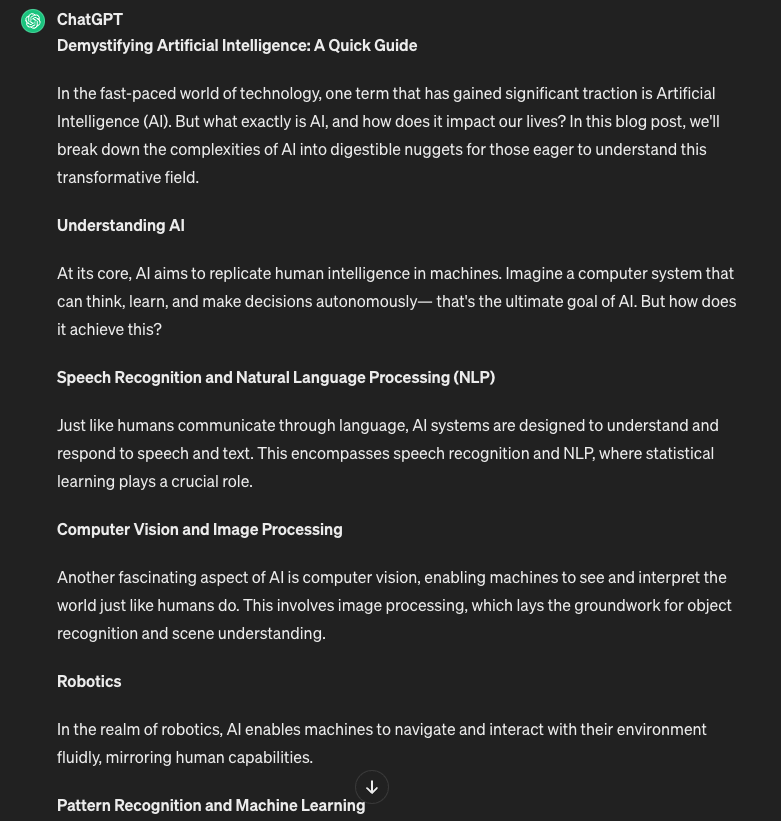
Below is the result we got on our first try.
Step 4: Add AI Generated Images (optional)
If you really want to take your blog to the next level, then you can use AI to create a beautiful featured image for your blog. To do so we will use DALL-E-3 which requires a Chat GPT Plus account.
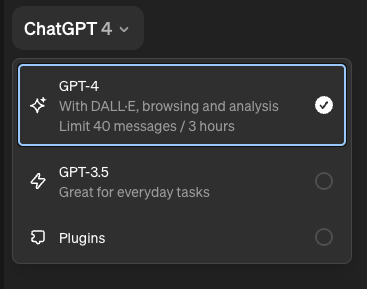
1. Switch to GPT-4
In order to generate images, we will need to use GPT-4 which has DALL-E-3 built in to it.
To switch models click the drop down on the top left as show below.
2. Add in the prompt
Similar to our prompt to generate a blog, we are going to use fairly simple prompt to generate a relevant image for our blog, but depending on your use case, you can expand the prompt in many ways to get a more desired result.
Here is the prompt we will use to generate a featured image for our blog:
3. Execute the prompt
Now that you have your prompt, simply paste it in and get the result!
This was the result in our case on the first try. Pretty cool, right?

Conclusion
Congrats! If you have reached this far then you have successfully converted a video into a AI generated blog post.
If you want a much easier way to convert videos to blogs with a lot more customization options, longer blogs, AI generated images, and ability to export as PDF or directly to your website you can check out Video To Blog and try it for free for 3 blogs a month.
FAQs / Troubleshooting
What if the YouTube video does not have a transcript?
If the video you want to create a blog post from does not have a transcript, you will have to transcribe using a third party service.
Most of the time this will require downloading the video which requires YouTube Premium, but there are some services out there that can transcibe the video using just a YouTube link.
How do I make longer blogs?
Getting GPT to generate blogs longer than 500 words is tricky, but here are some tips and methods that you can use to generate longer form blogs:
- Add a word requirement in the prompt: This usually helps to get GPT to write at least ~600 words. You can add something like "Write at least 700 words" in your prompt.
- Specify an outline: This works really well if you specify a longer outline and also pair it with a section word length. Something like "Use the following outline... and ensure that each section is at least 250 words."
- Use multiple prompts: This is the best method if you really want to create a longer blog (1000+ words). You can get Chat GPT to generate an outline and then based on that outline use a prompt to generate each section.
How do I export blogs to my website?
This depends on your website platform, but generally, if you tell Chat GPT to output its response in HTML you should be able to then take that HTML and import it on your website regardless of your platform.
What if the transcript is too long?
If the transcript it too long and you are exceeding the context limits you have a few options.
- Use GPT-4: GPT-4 has a 128k context window which should be large enough for most videos.
- Only use a portion of the transcript: If you are only interested in a particular section of the video, just use that portion of the transcript.
- Compress the transcript: This is a bit of a more advanced technique, but due to the predicative ability of GPT, you can use various compression techniques to reduce the size of the transcript and often not lose much of the context. A simple way to do this is to just remove every other word from the transcript.